Table of Contents
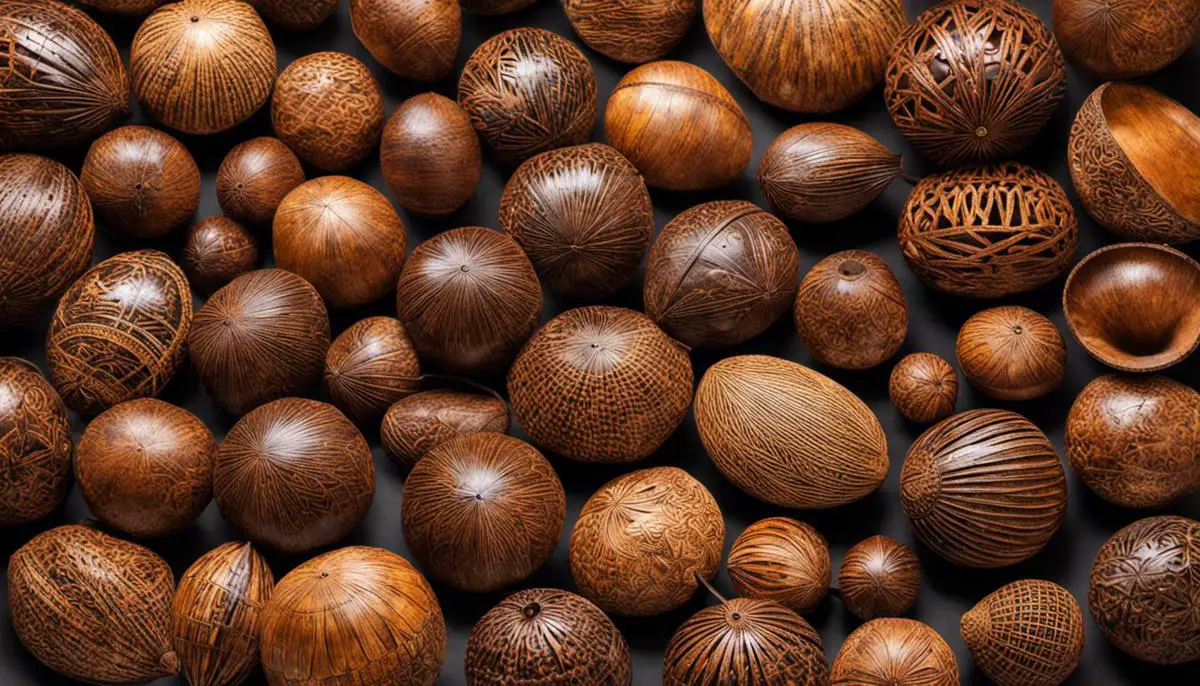
Coconut shell crafts represent a fusion of nature, creativity, and sustainability. In a world constantly seeking green solutions, the humble coconut shell, often disregarded as mere waste, presents itself as a wonderful medium for art and utility objects alike. This essay will guide you through the fascinating journey of transforming ordinary coconut shells into works of beauty and function. You will delve into the core concepts, processes, and techniques used in coconut shell crafts, beginning from the selection and preparation of the proper shells, to the art of crafting and experimenting with various artistic expressions.
Understanding The Basics of coconut shell crafts
Understanding The Structure of The Coconut Shell
The coconut shell, the hard outer layer of the coconut, is divided into three basic sections: the husk, the shell, and the meat. Each has unique qualities that make it useful for crafting. The husk, or the outermost part, is rough and fibrous making it ideal for creating rustic looking crafts. The shell, found beneath the husk, is smooth, hard, and has a darker color which can be used for more elegant and polished crafts. The meat, although not frequently used in crafting, can be scraped off and used in other ways like cooking. Unrefined, the shells are hard to shape or work with, so it’s crucial to prepare them properly.
Necessities: Assembling The Right Tools
To work with coconut shells, you’ll need some basic tools. A sharp knife or a saw is essential for breaking open the coconut. In order to hollow out the inside and separate the meat from the shell, a spoon or a meat scraper will be of good use. Sandpaper of various grits is necessary to smooth the exterior and interior of the shell. If you plan on drilling holes or making detailed carvings, a drill with various bit sizes and carving tools will be helpful.
Encoding Safety Measures
Working with coconut shells can be hazardous due to their hard nature and the sharp tools involved. Always remember to use safety gloves to protect your hands and use goggles to protect your eyes from small particles when cutting, carving, or sanding. Never rush while working with sharp tools or while handling the coconut to avoid accidental injuries.
Mastering The Techniques of Coconut Shell Crafts
Once you have understood the structure of the coconut shell and have your safety measures in place, it’s time to craft. Here are some steps that can be used to create coconut shell crafts:
- Preparation: The coconut shell must first be cut in half using a sharp knife or saw. Always cut outside the middle line to avoid damaging the shell.
- Cleaning: The meat is then scraped out with a spoon, and the coconut shell halves are soaked in warm water for a few hours; this softens the shell, making it easier to work with.
- Smoothing: After drying, use a variety of sandpaper grits to smooth the inside and outside of the shell to your desired smoothness.
- Designing: Depending on what you plan to make, you might need to drill holes, make cuts, or carve designs into the shell. Start with a pencil to sketch your design before making permanent cuts.
- Finish: After crafting, apply food-safe mineral oil or shellac for a shiny finish to your coconut shell crafts. This protects the crafts and gives them a polished look.
Remember, take your time with each step of the process, as rushing can lead to mistakes or even damage the shell. With practice, you will be able to shape and design coconut shells with greater precision and complexity.

Coconut Shell Preparation
Choosing the Right Coconut Shell
When starting your coconut shell crafts, the first step is to make sure you’re selecting the right coconut. You’ll want to choose a mature coconut, which are brown and have a hard shell. Give it a shake to make sure there’s some liquid inside, which is a good sign the nut is fresh. Mature coconuts, as opposed to green coconuts, are the ones that have a hard, woody shell perfect for crafting.
Splitting the Coconut Shell
To split a coconut shell, first drain the liquid by puncturing the eyes of the coconut using a sharp, sturdy tool such as a screwdriver or a drill. Once you’ve opened the eyes, drain the water into a container. You can easily distinguish the eyes from the rest of the coconut because they seem like depressions or holes on the shell.
To split the shell in half, hold the coconut in the palm of your hand, positioning it like a bowling ball with the eyes facing downward. Strike the middle of the coconut with the backside of a heavy cleaver or a hammer. Rotate the coconut while continuously hitting it until the shell starts to crack open.
Cleaning the Coconut Shell
Once you have your halves, clean the interior of the shell by removing the meat. Depending on how mature the coconut is, you can use a butter knife or a spoon to do this. The white edible part of the coconut is often attached quite firmly to the shell, so you may need to apply considerable pressure to remove it.
After removing the meat, rinse the interior of the coconut shell using warm water. You can use a dish scrubbing brush to remove any additional coconut particles or fiber residues inside the shell. For any stubborn deposits, soaking the shells in water for a few hours or overnight can help.
Smoothing the Coconut Shell
The next step in coconut shell preparation for crafts is to smooth the shell, both inside and out. Using a coarse sandpaper (often 80 to 120 grit), start scrubbing the surface of the shell to remove the rough and textured surface. Be sure to work on the inside and edges as well. This is a dust-heavy task, so consider doing this outdoors or wear a mask. After the initial rough sanding, follow up with a finer sandpaper (such as 400 to 600 grit) for a smooth finish.
Once smooth, sponge clean the shell one more time to remove any sanding dust. Allow the shell to dry completely, and it’s now ready for use in any number of crafts. With patience and care, a coconut shell can provide a unique, organic base for your crafting needs.

Crafting and Experimentation
Choosing the Right Coconuts
It’s best to start with mature coconuts, as they possess hard shells that are easier to manipulate for crafts. Before crafting, remove the husk and meat from the coconuts, leaving the shell intact. Allow the shell to dry out completely, which usually takes about a week.
Prep the Coconut Shells
Once the shells are dry, scrape off the dark brown, hairy skin. Wash the inside and outside with warm soapy water to remove any remaining coconut meat or milk. Allow the shells to dry for another day. Once dried, sand down the shells with sandpaper to achieve a smooth finish.
Shape the Coconut Shell
For bowls or decorative items, use a sharp knife or saw to carefully cut the shells into the desired shape. Remember to always take necessary precautions while handling sharp tools. For smaller crafts or jewelry, use a small handsaw.
Sanding the Coconut Shell
To get an even smoother finish, sand the outside, inside, and edges of your shell. Always start with coarse sandpaper and progress to finer grades. This step is especially essential if you plan to carve or paint the coconut shells.
Carving the Coconut Shell
Perhaps the most intricate aspect of coconut shell crafts is carving. Ideas for carving include floral designs, geometric patterns, or figures. Always use a sharpened chisel or knife for clean cuts. Begin the carving process by sketching your design onto the shell. Then, carefully follow your sketch with your carving tool, keeping your strokes consistent.
Coloring and Decorating the Coconut Shell
Acrylic or oil-based paints adhere particularly well to coconut shells, adding a burst of color to your crafts. Use a brush or sponge to apply the paint, depending on the effect you want. Let the paint dry between coats. If desired, add decorative elements to your craft. Consider gluing beads, fabric, or other items to enhance your design.
Sealing the Coconut Shell
Once your design is completed and the paint has dried, finish your craft with a sealant or varnish. This protects the design and gives your craft a professional, glossy finish. Opt for a non-toxic sealant if you plan to use your craft as kitchenware.
Crafting Coconut Shell Jewelry and Trinkets
Create pendant necklaces, earrings, or bangles with smaller pieces of coconut shell. Always sand and seal these pieces to ensure smoothness. You can either leave them natural or paint them. Remember to create a hole for the string or chain before sealing or painting.
Coconut shell crafts provide an environmentally friendly way to create unique, handmade items. They’re a charming homage to natural beauty, perfect for gifts or sprucing up your home decor. Just remember, the key to any successful craft project is patience and creativity.

Unleashing your creativity through coconut shell crafts can be an incredibly rewarding experience. Armed with the knowledge from this guide, your imagination is the limit to what you can create. From simple household items to intriguing ornaments, there is a world of possibilities to explore within the confines of a coconut shell. Remember, each piece is unique in its texture, shape, and patterns, meaning every craft you make is a distinct product of nature and your creativity combined. Indeed, coconut shell crafts are not only about re-purposing natural waste but also about celebrating the beauty found in the most unexpected places.
